Working With Categories
Before we begin: Please note that the "Working with Categories", "Working with Items", "Working with Authors" and "Working with Tags" articles in Power Content's documentation are fairly repetitive since they all operate under the same concepts. Even though the concepts are almost the same, there still are differences in operating them so I encourage you to read them all.
Power Content’s categories are very powerful and you can create unlimited nested categories (sub and parent categories). Use your categories to route items, set the items themes, set their own themes, set categories with Plugins, Content Fields (custom fields), assign items with Content Fields by their category, and much more. Categories’ awesome functionality in Power Content is one of the reasons this CCK is so flexible and powerful.
In this article we will cover the following topics:
- Setting up categories and nested categories (sub and parent categories)
- Assigning items to categories (and multiple categories)
- Accessing categories data in the code
- Creating menu items for categories
This article will NOT cover the following topics:
- Setting custom Themes to Categories – To learn how to do this, visit the “Themes Engine” part the documentation.
- Setting Content Fields (Custom Fields) to Categories – To learn how to do this, visit the “Content Fields” part of the documentation.
- Managing the Categories SEO – To learn how to do this, visit the “SEO Management” part of this documentation.
- Setting Pagination to Categories – To learn how to do this, visit the “Pagination Options” part of this documentation.
- Working with Plugins – To learn how to do this, visit the “Plugins” part of this documentation.
Setting up categories and nested categories
Before we begin, note that you can’t create items without categories. You can assign items to multiple categories, but you can’t assign none, so when we start creating content with Power Content we will first need to create at least one category so that we can put our items in it.
Let’s start creating new categories:
Go ahead and navigate to the “Categories” view of Power Content by clicking the “Categories” on the Power Content top or side menus.
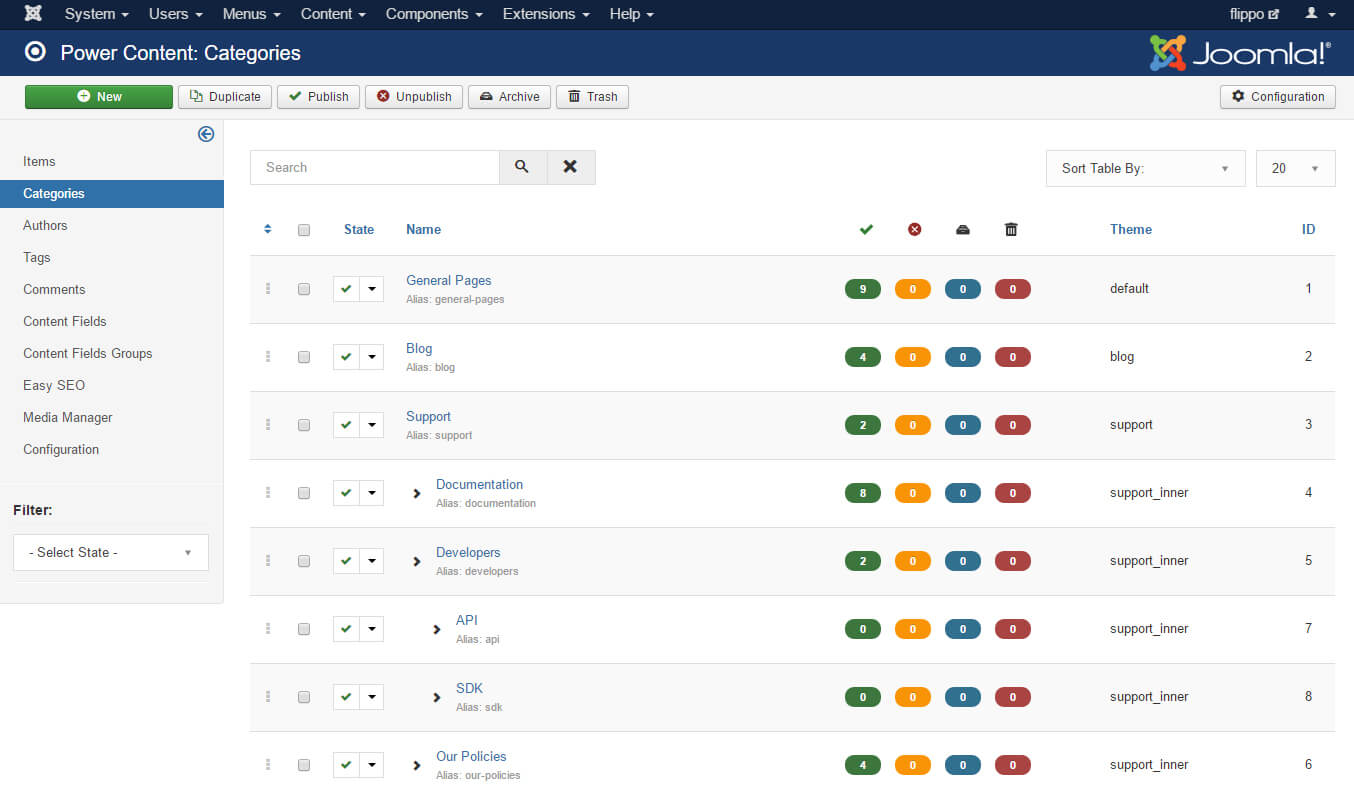
As you see in the picture above, in the categories view you will be able to see all the categories of your website, including some statistics about them, their theme, name, ID, and alias. In addition, you can publish, unpublish, duplicate, delete, trash, archive, filter search, and sort.
Note that in the picture I’ve attached, you can actually see the hierarchy of the nested categories feature I was mentioning earlier. The category “Support” has “Documentation”, “Developers”, and “Our Policies” as direct sub categories, and “Developers” (which is already a sub category of support) also has two sub categories of its own: “API” and “SDK”. There is no limit to how many sub categories you create; you can reach 1,000 if you like.
Let’s create a new category. Click the green “New” button.
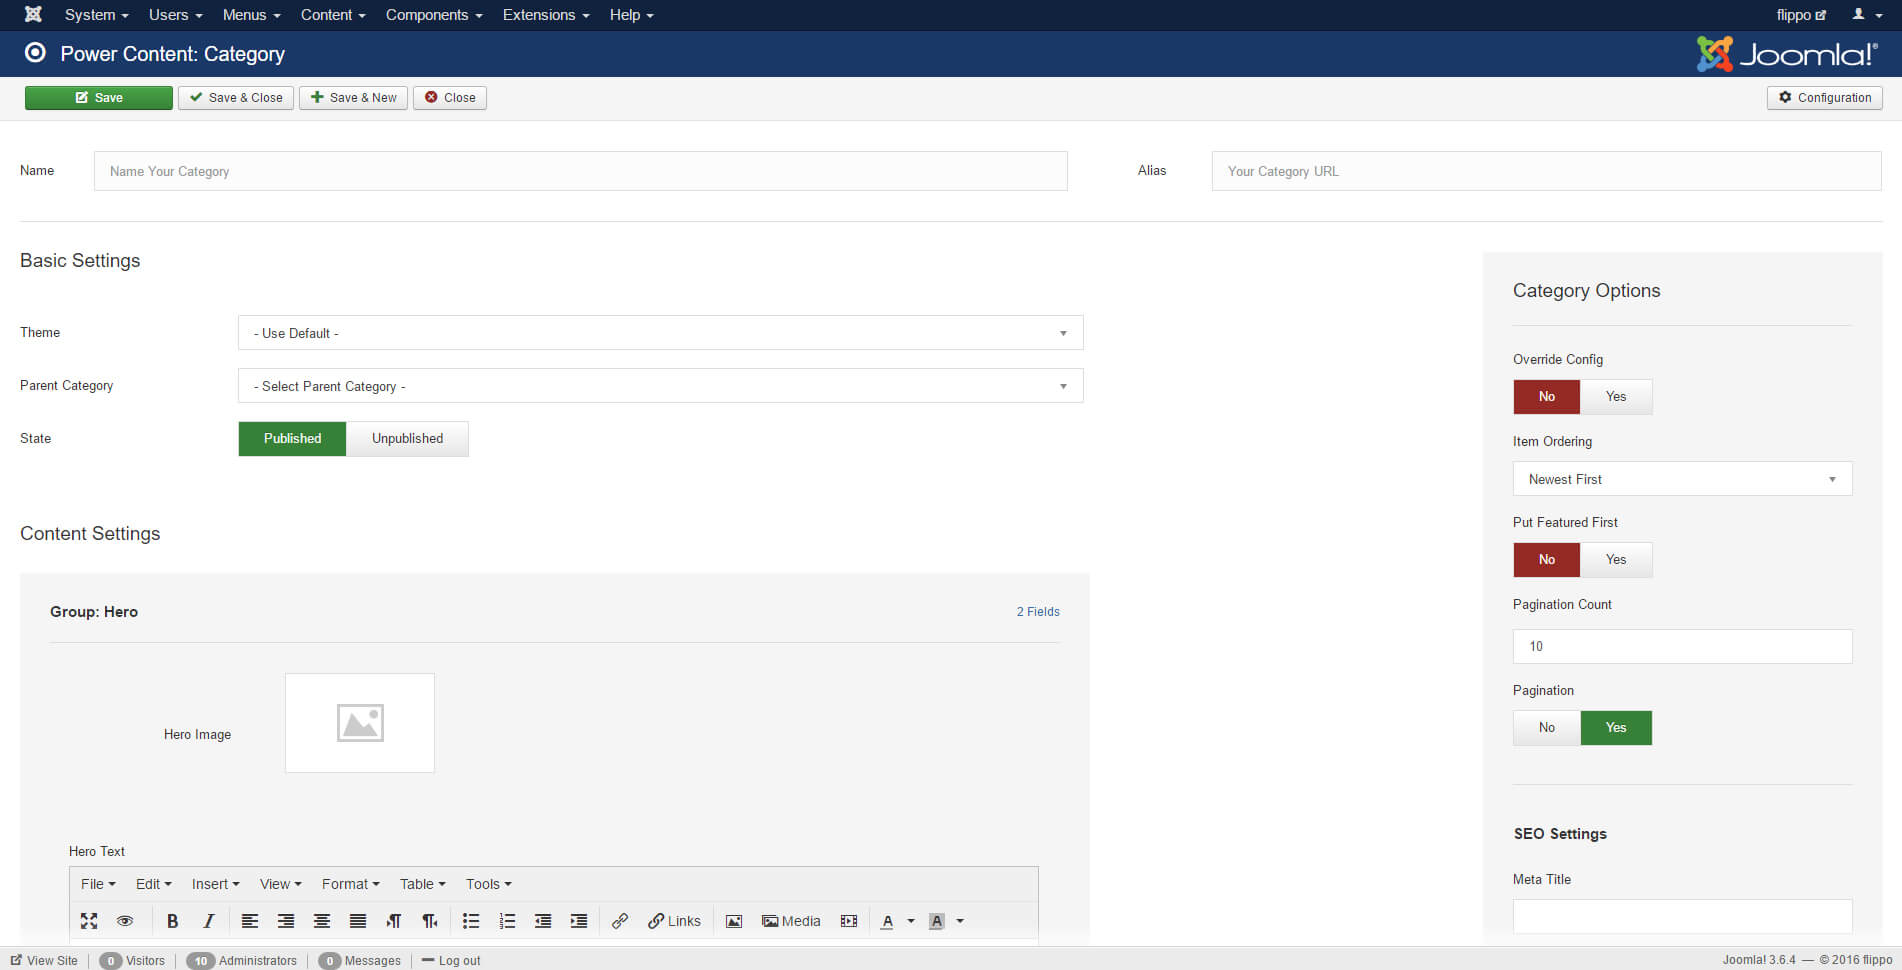
Just like in most of the other record types in Power Content, you’ll have five sections of information to fill out:
Name & Alias – The name is the name of this category that will be displayed in the frontend, and the alias will be the part in the URL that corresponds to this specific category.
Basic Settings – This is where you choose the theme (learn about themes here) and the state (published/unpublished) of the category. This is also where you choose if this category has a parent category. Simply click this field and you will see all the other categories of your website. Simply choose one if you wish.
Category Options (The gray sidebar) – Here you will set three things: 1. If you wish to, you can override the config settings (learn about the config here); 2. The pagination settings of the category (learn about the Pagination feature here); and 3. The ordering of the items that will be shown in the list of the category view “Item Ordering”. This is also explained in more detail in the ‘Basic Configuration’ part of the documentation.
Content Settings – This is where your Content Fields will appear. (Learn about the Content Fields here).
SEO Settings – This appears after the “Category Options” to the right. (Learn about the SEO Settings here).
You may have noticed that in the picture, under “Content Fields,” there are fields that you don’t see in your installation, and that is because, in the website I took this screenshot from, I have set up different Content Fields. You can (and should) do this also, according to your needs. Learn about Content Fields here.
IMPORTANT: I know that for each option I’m sending you to a different part of the documentation, and this is because each and every single part of the system is explained in great detail and I don’t want you to get confused. So go ahead and visit the dedicated docs.
Assigning items to categories
After setting up a new category (or categories), it’s time to put some items into it. Let’s navigate to the “Items” view and edit an existing one, or create a new one.
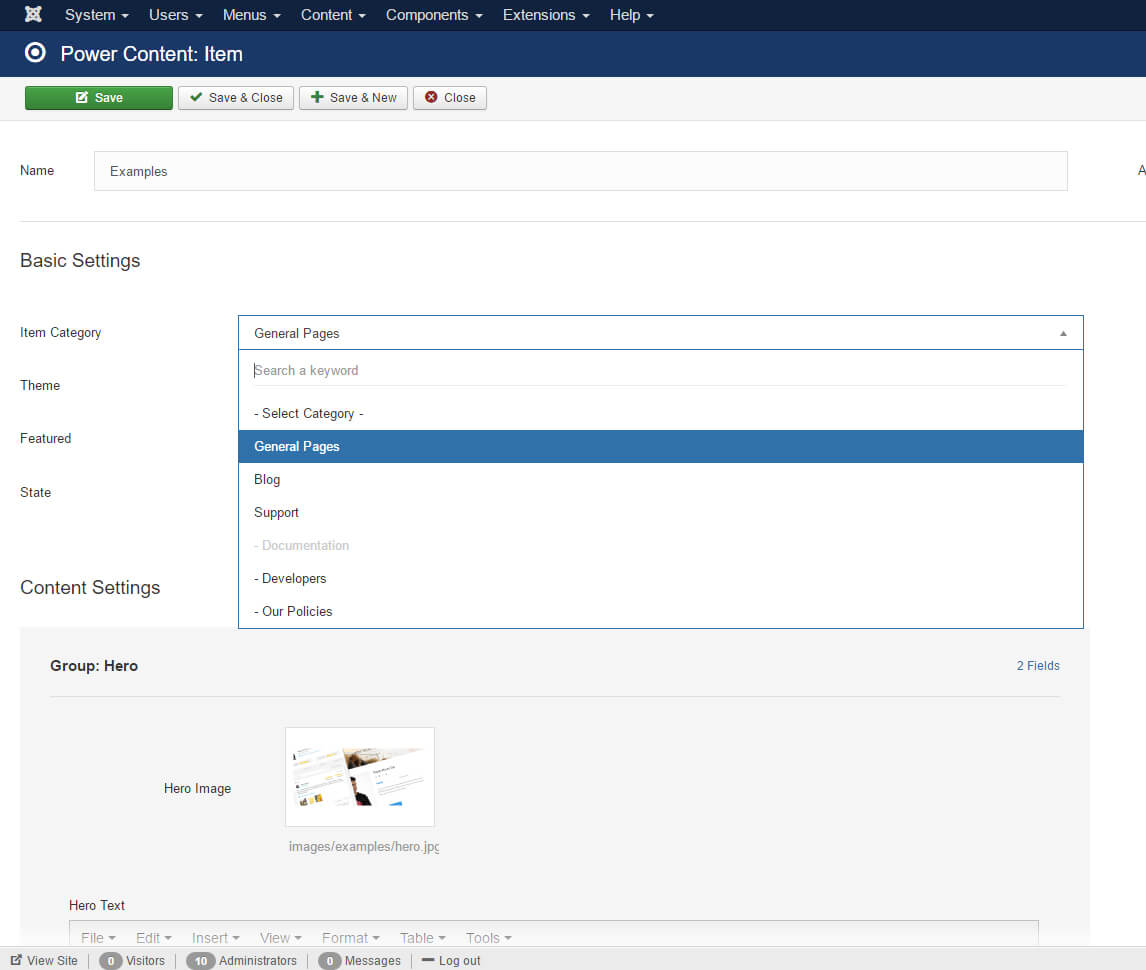
As you can see in picture above, to assign a category to an item, we simply click the “Item Category” field, and choose a category from the drop down. Note that you will see your sub categories and parent categories right next to each other with the proper indentation so you can easily identify what is what. That’s it! Our item now has its own category.
Assigning items to multiple categories:
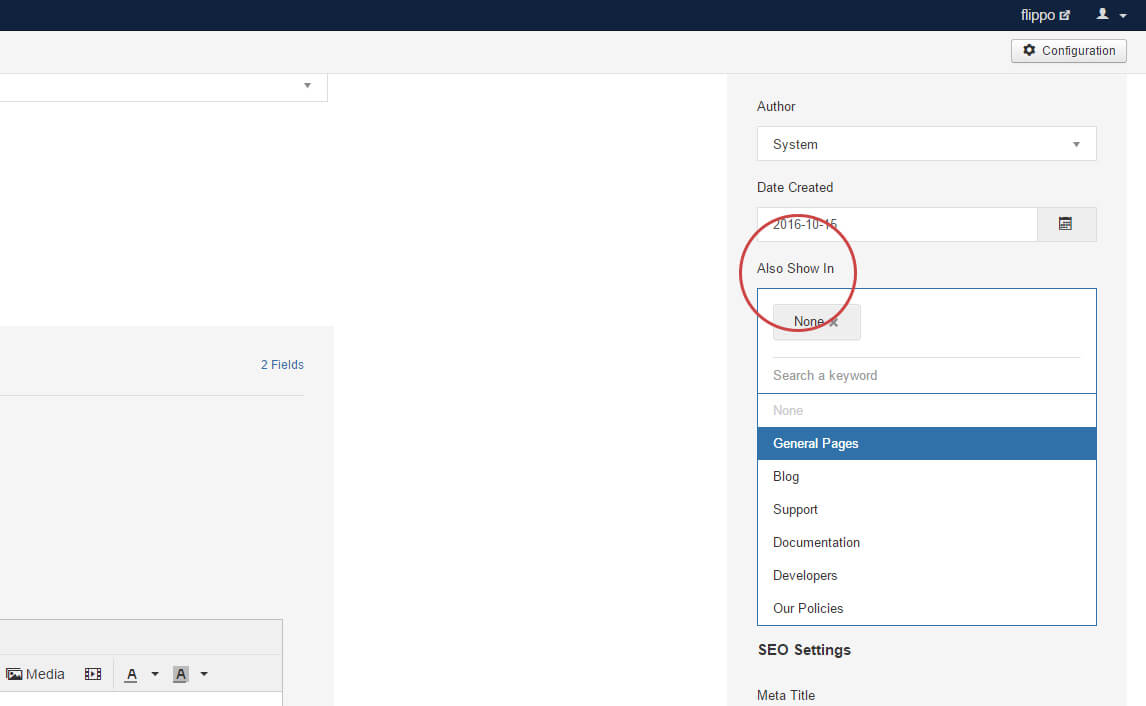
In the items editing and creation page, there’s an option named “Also Show On”. Clicking this will show a dropdown of your website’s categories. This field is a multi-selection field, and you can choose as many categories as you like here. After choosing the categories you wish, this particular item will also be displayed in the categories you have selected here, and not only in this “main” category.
Accessing categories data in the code
The category data will be available for you anywhere you display items, as the item’s category data on the category views, of course, and when displaying categories using Power Content’s Categories Module (learn more about Power Content modules).
If you are using the Themes Engine to create your own themes and layouts, I’ll show you an example of accessing category data below:
When accessing the data in a category view, we’ll use the following code:
<? php echo $this->category->{theData}; ?>{theData}, should be replaced with the actual property name that we wish to access, for instance: name, alias, id, fields, parentCategory, and so on. For example:
<? php echo $this->category->name; ?>
<? php echo $this->category->fields->{fieldName}->value ; ?>
In the above example, we will replace the {fieldName} with the actual Content Field we are trying to access. Information about how to do this can be found in the “Content Fields” section of this documentation.
When accessing the author data in other layouts, such as categories, tags, or search results, it will usually be inside a PHP loop that displays a list of items. For example:
<? php
foreach( $this->category->items as $item ) {
    echo $item->name;
    echo $item->category->name;
}
?>
The piece of code above will bring us all the items of a specific category and will display the item name and then the item's category name.
You can also access TONS of other information, such as the category link, fields, parent and sub categories, and much more. Check out the Power Debugger Plugin part of the documentation to learn how to see and access your data easily even if you’re not a PHP developer.
Creating menu items for categories
Creating menu items for Power Content’s categories is done exactly the same as for any other component in Joomla. Beforehand, I’ll advise you to read and understand Power Content’s Router, since it’s reducing the need for endless menu items.
In order to create a new category menu item, go to the Joomla Menu Manager, navigate to your desired menu, and create a new menu item. Now, click the blue button “Select Menu Item Type” and choose “Power Content” -> “Category”.
Now you will be able to click the orange button that has appeared, and choose the category for which you would like to create the menu item. Check out the image below:
