Power Content Pagination Options
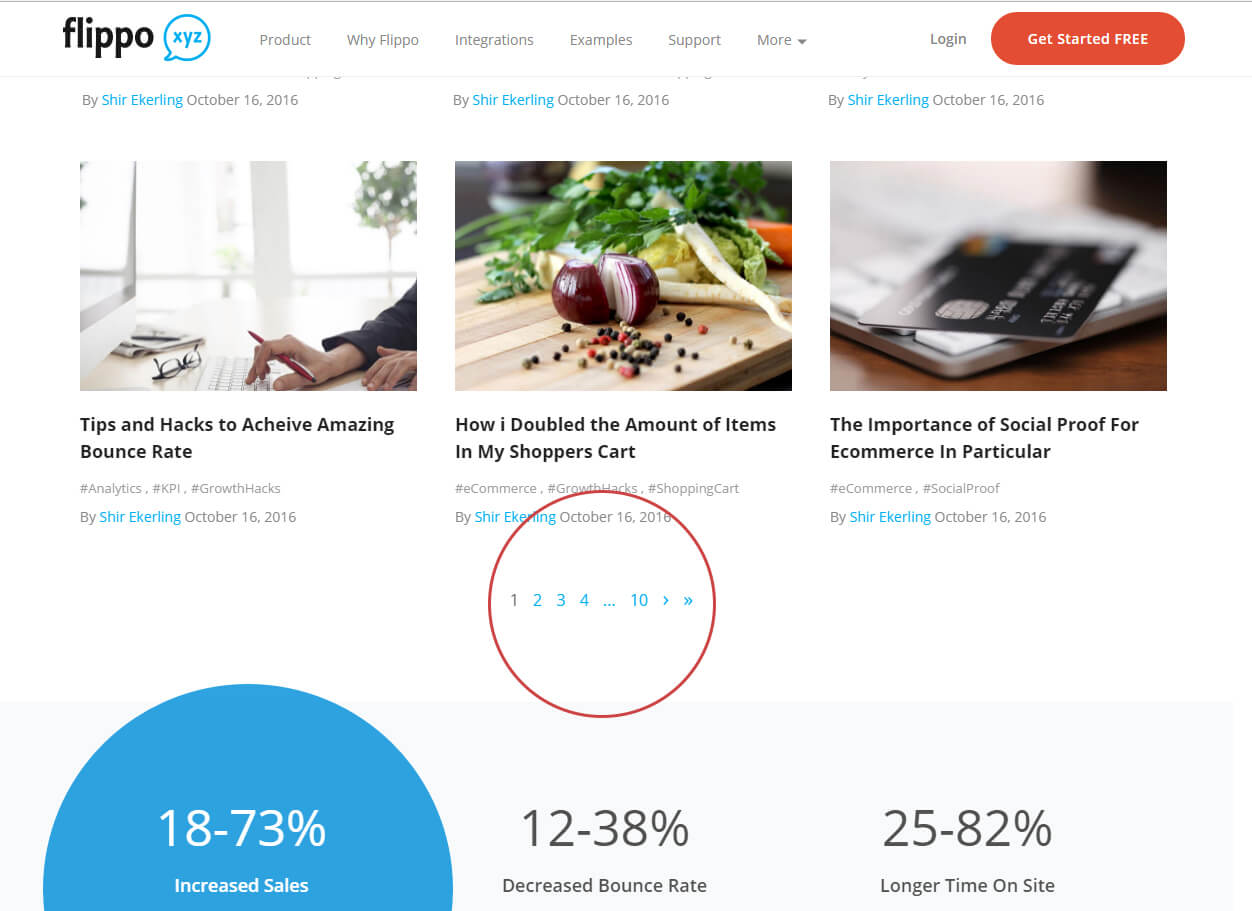
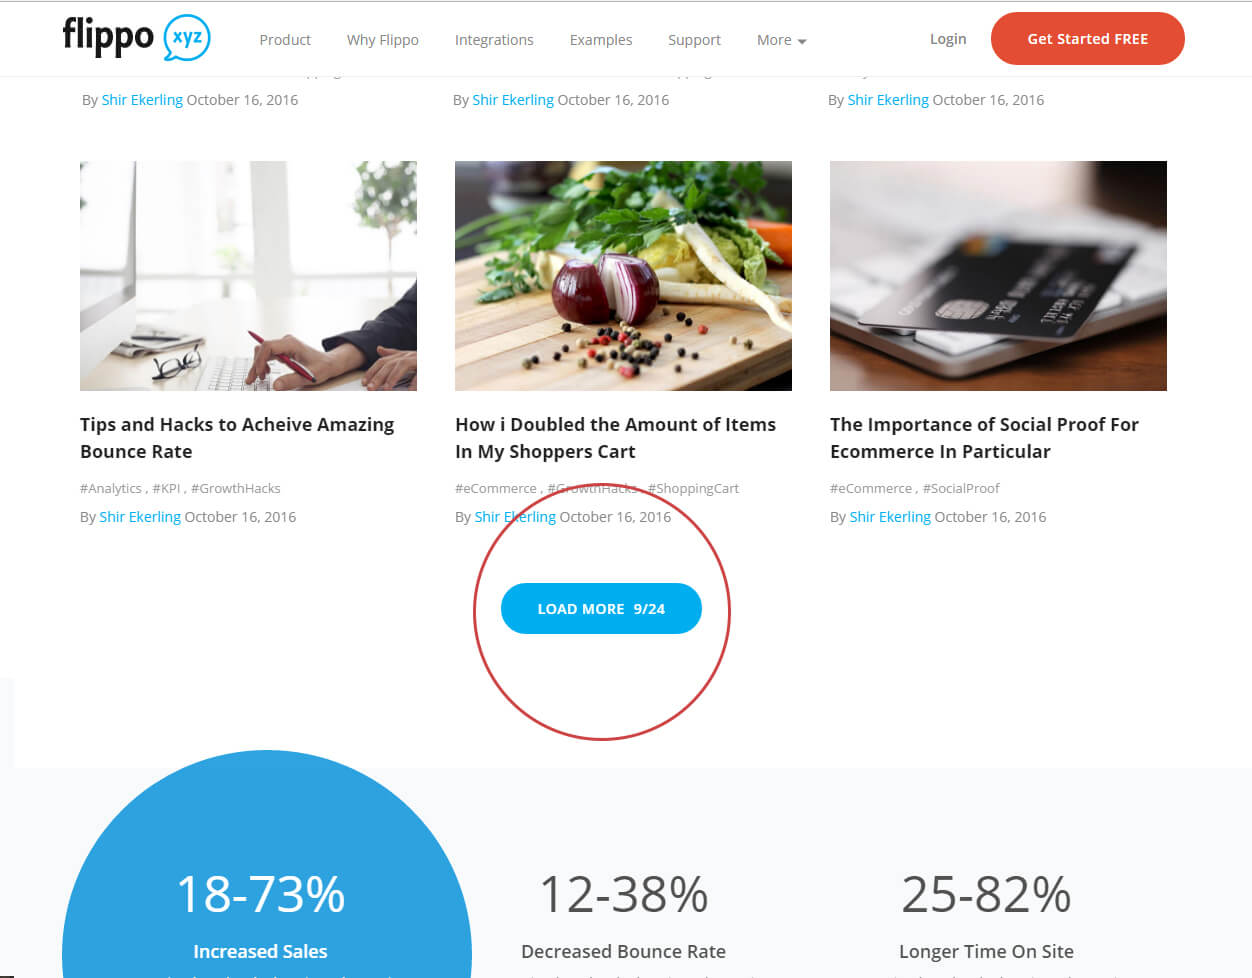
There are three built-in types of Pagination in Power Content: standard pagination (arrows and numbers), load more button, and infinite scroll. In this article, you will learn how to work with it.
Topics that will be covered in this article:
- Setting up the pagination
- Calling the pagination in custom layouts
- Overriding & customizing the pagination HTML
- Code explanation for Override
- Developers: The Pagination Object
Setting up the pagination
Setting up the pagination has two simple steps: 1. Choosing the type of pagination we like; and 2. Defining how many items will appear on each “page” or “batch” of the pagination.
Let’s start with the basic configuration:
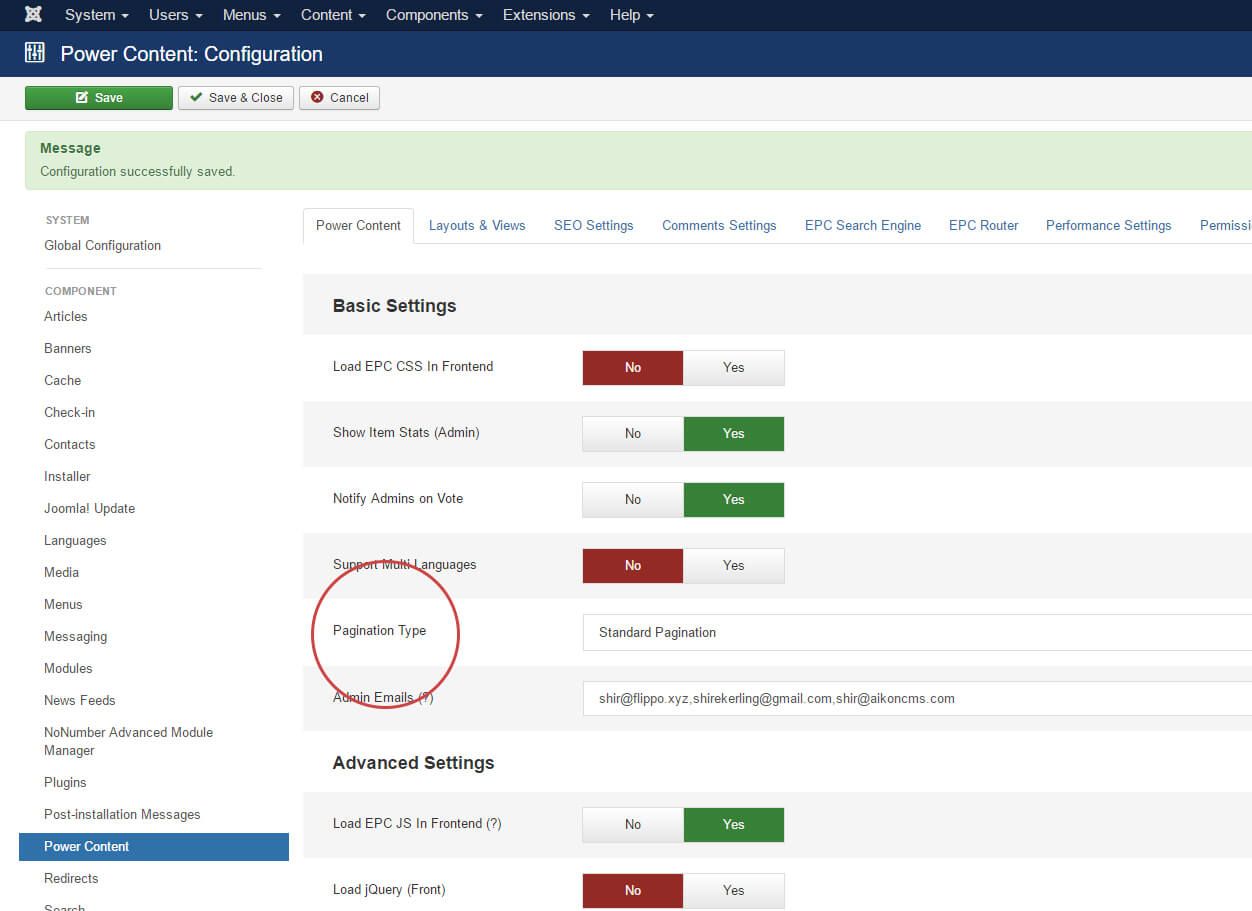
Navigate to Power Content configuration view by clicking the “Configuration” button from any view of Power Content. Under the first tab, “Power Content”, you will see an option named “Pagination Type”. This is where you choose if the pagination is a standard pagination, load more button, or infinite scroll. After you’ve chosen your required type of pagination, switch to the tab named “Layouts & Views”. Take a look at the following pictures and then I’ll explain.
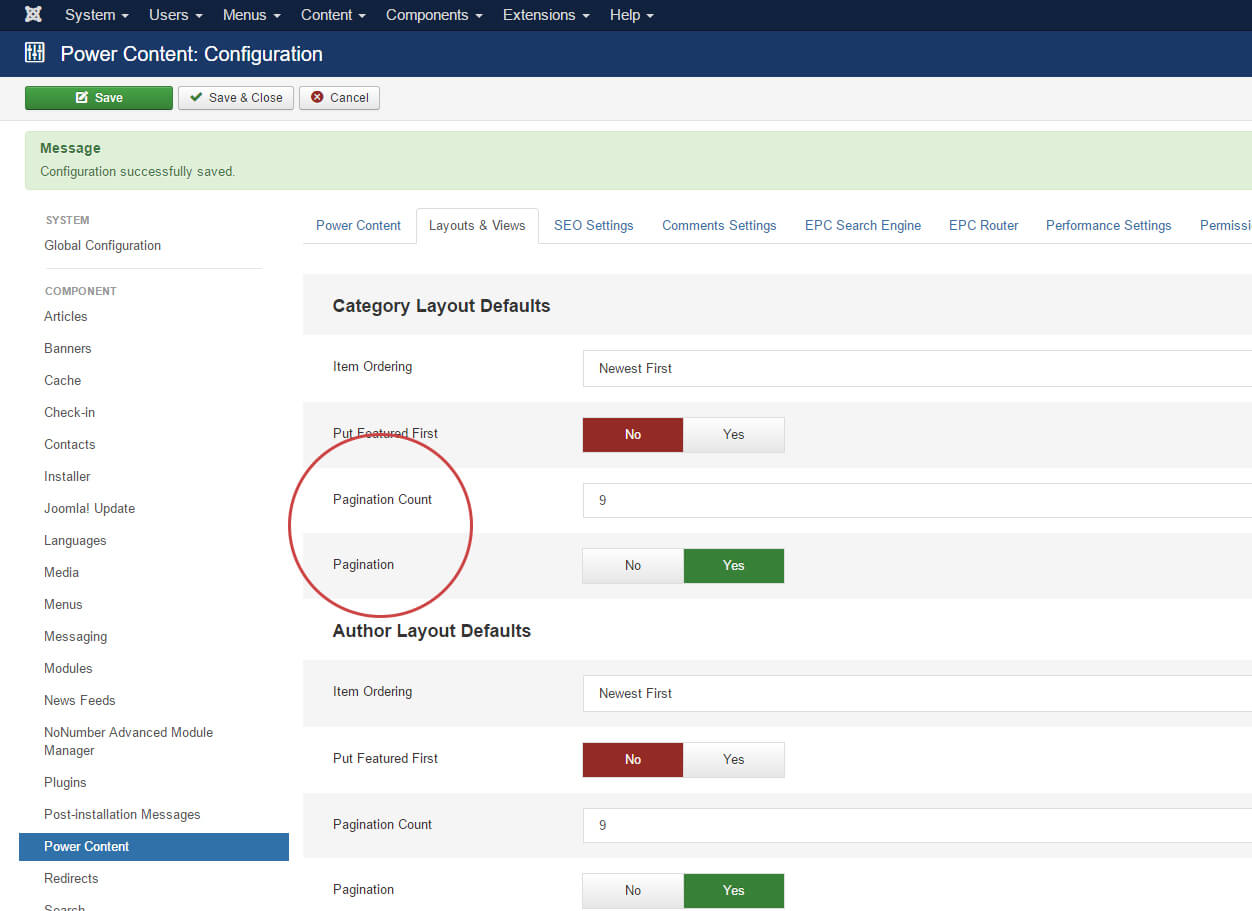
As you can see, the tab “Layouts & Views” allows you to set defaults for ordering and pagination of the category, author, and tag views. More info can be found in the “Working with Categories”, “Working with Authors” and “Working with Tags” pages of this documentation.
In the fields named “Pagination Count”, we define how many items will be seen on each page or each batch of the pagination. For example, if we choose 9, then the load more button will load nine items each time it was clicked. The infinite scroll will load nine items each time the user has scrolled down to the last visible item and the standard pagination will show nine items on each of its pages.
The “Pagination” option is a Yes / No option to completely disable or enable pagination.
Important: The options here are merely default settings. You can, at any time, choose that specific categories, authors, or tags will have different settings; enable / disable pagination; and assign a different number for each page or batch. This is done from the category, author, or tag editing pages, on the right side of the page. Note the picture below and then I’ll explain:
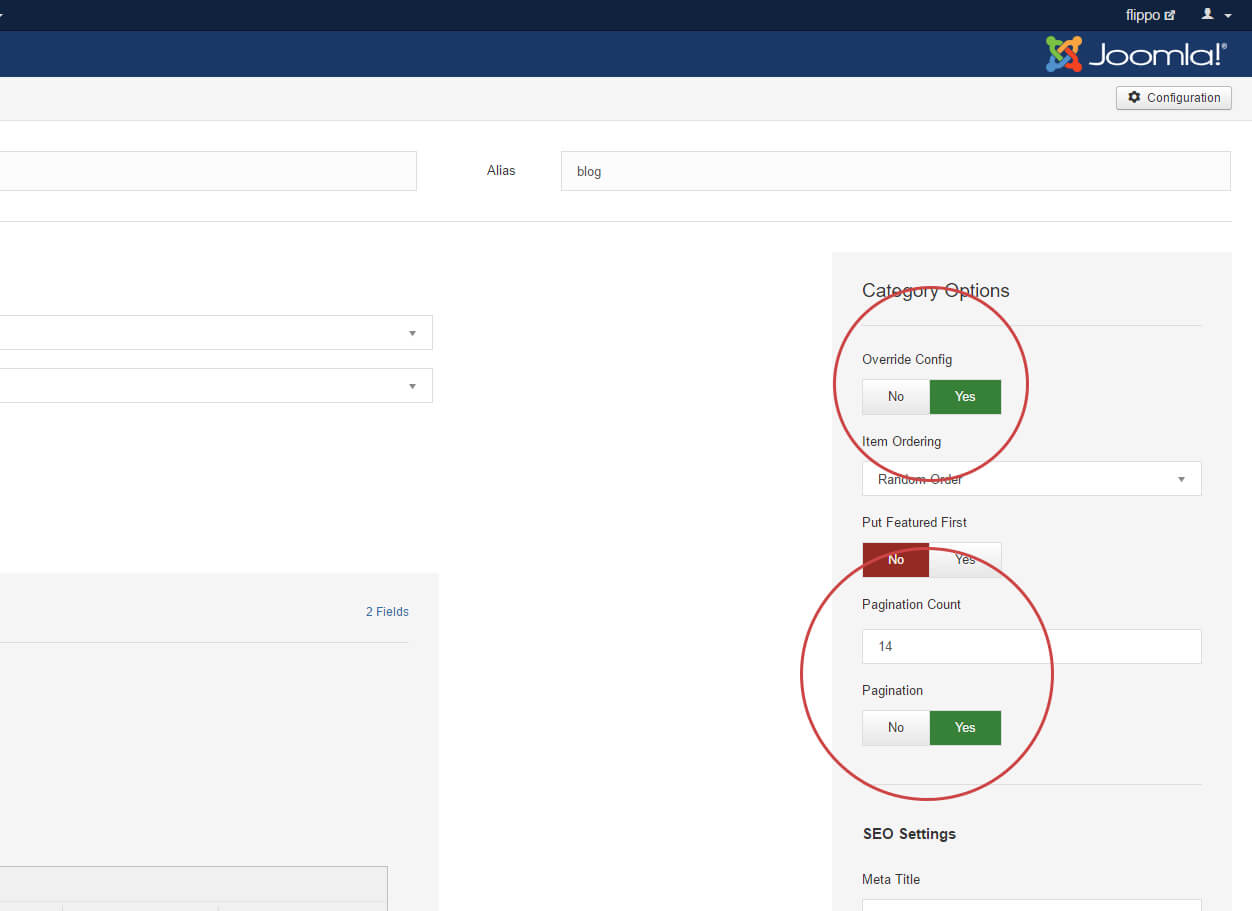
What you see in the picture is a category named “Blog” that has different settings for its pagination than the defaults in the configuration view. If the top option, “Override Config”, is set to yes, the settings for this particular category will be taken from here instead of the main config. As you can see, you can change the amount of items that will be shown on each page or batch of the pagination. This is also applicable is authors and tags.
Calling the pagination in custom layouts
If you have created your own “theme” or “layout” using Power Content’s Themes Engine, you will also need to insert the PHP line that calls the pagination to the page. If you have looked at the default theme, then you might have noticed the following line:
<? php echo $this->getPagination()->getHtml(); ?>Simply write this line and the pagination will appear.
Overriding & customizing the pagination HTML
If you wish to customize the HTML of the pagination, you can override the default HTML file. Usually, the reason people want to override the HTML is to put in their own icons, change some HTML classes, tweak the HTML structure, or maybe to insert some text somewhere.
The way to do this is to go and copy the following file:
root/components/com_epc/libraries/EpcPagination/pagination.html.php
and paste it in your template under the following structure:
root/templates/yourtemplate/html/com_epc/pagination.html.php
Now, each time the pagination is called, it will first look for your file; if it is found, this is the file that will be loaded.
Code Explanation for Override
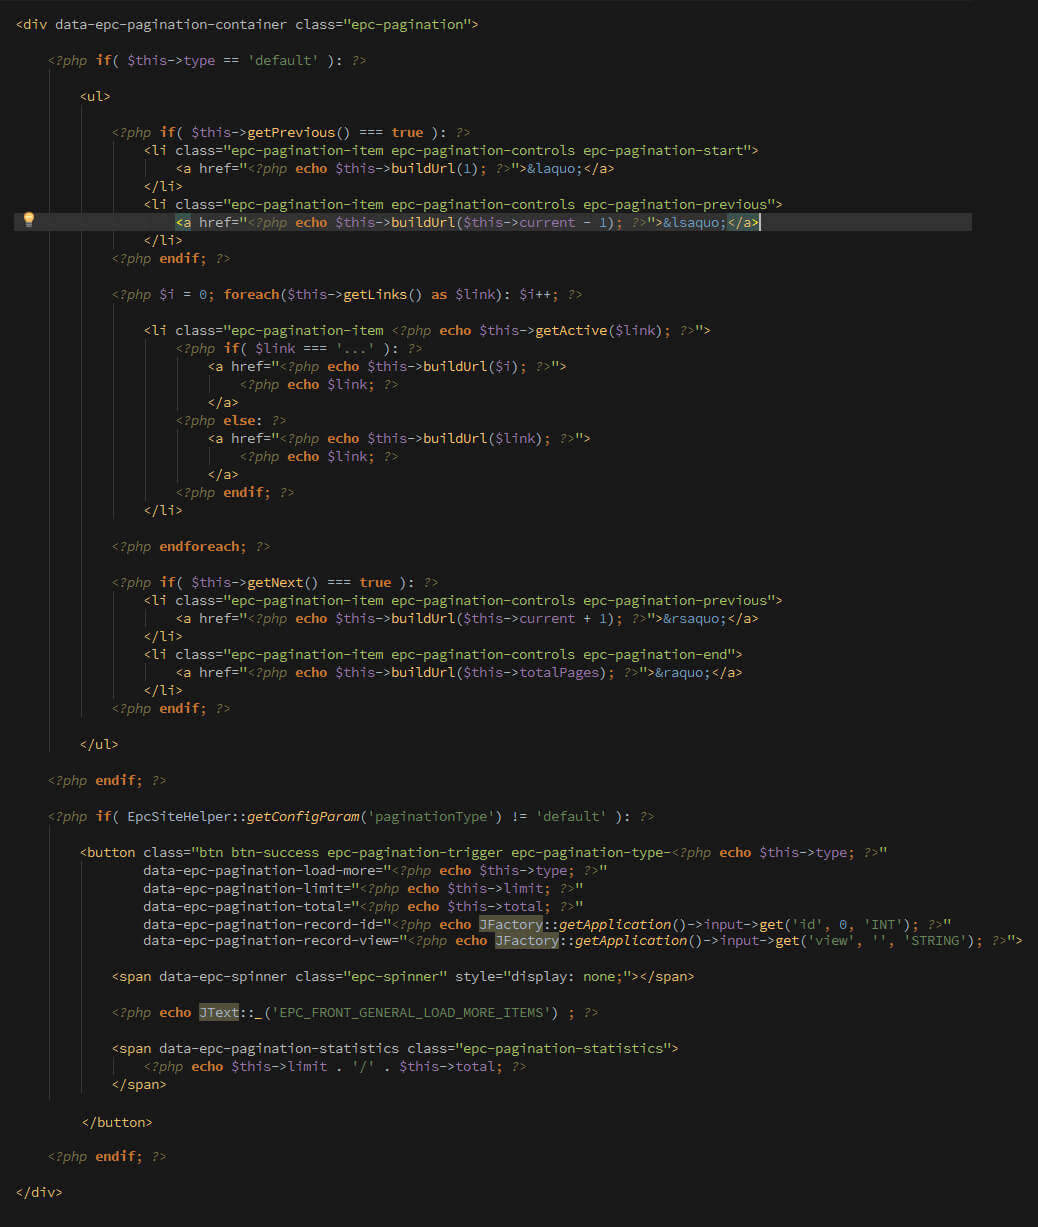
This is the code that you will see in this file. You can change and tweak it however you like, just note that you MUST keep the data attributes that you see on some of the elements. Those data attributes are used by the Infinite Scroll and the Load More Button pagination scripts. If you remove those, it will stop working.
I’ll quickly explain the code you see there:
As you can see, it is separated into two sections; the first is a < ul > tag that contains all the list items for the standard pagination and the second and last section is a button, which will be the load more pagination. NOTE: This button must stay even for the infinite scroll pagination; the only difference is that it will be hidden.
You can change, add, and remove any elements and classes you like. You can even change this to work differently, instead of a < ul > and list items, with spans or divs, or whatever. BUT, you must keep the PHP logic and the HTML data attributes. (Unless you are a PHP developer and know what you are doing, then go ahead and have fun).
Another very important thing: If you look at the following file:
root/components/com_epc/views/category/tmpl/listItem.php
You will see that this file is the HTML structure for items shown in lists views; in this case, in a category view. Take a look at the top < div >. It has the following data attribute: data-epc-item. This is also a MUST keep. The reason for that is that the JavaScript method that triggers the infinite scroll and load more pagination types will count the amount of items with this data attribute to decide their next batch to load.
< div class="epc-listing-item" data-epc-item>Developers: The Pagination Object
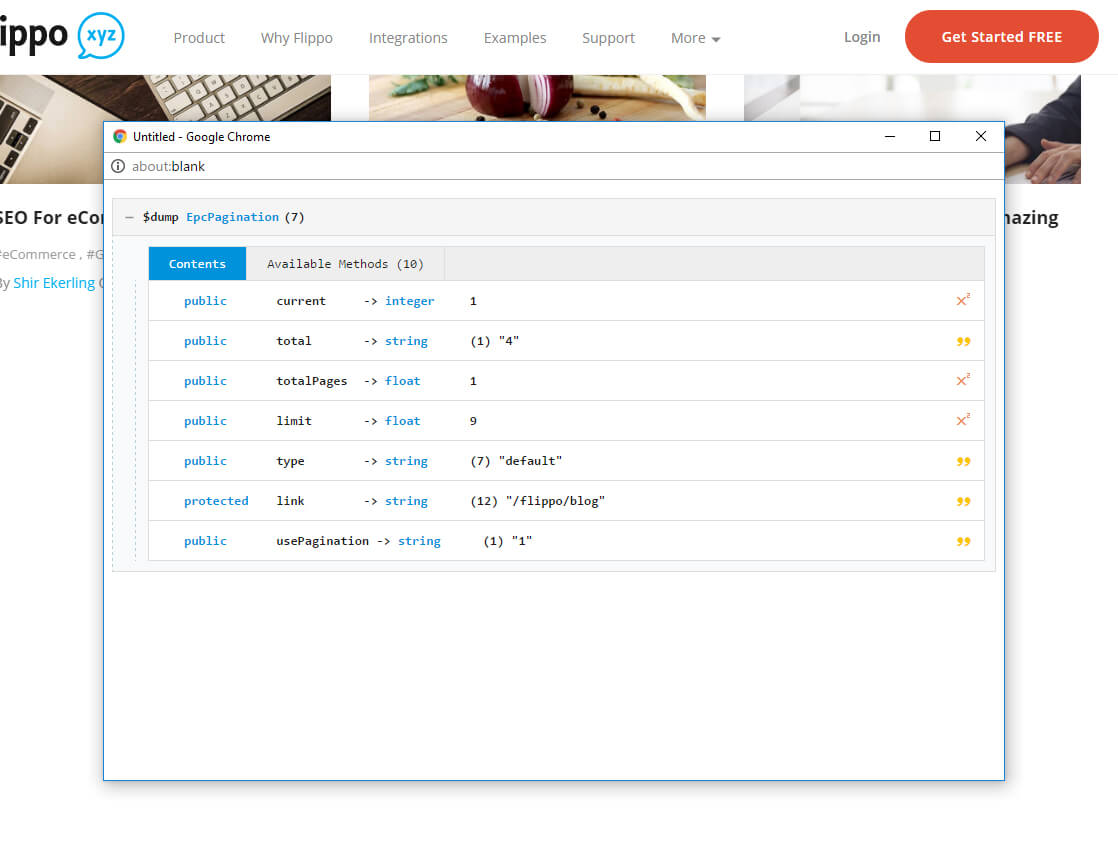
The pagination object has several methods and properties you can use. Go ahead and dump $this->getPagination(); to see them. You can (and should!) use the Power Debugger built-in Plugin.
The following properties are available to you:
As well as the following methods:
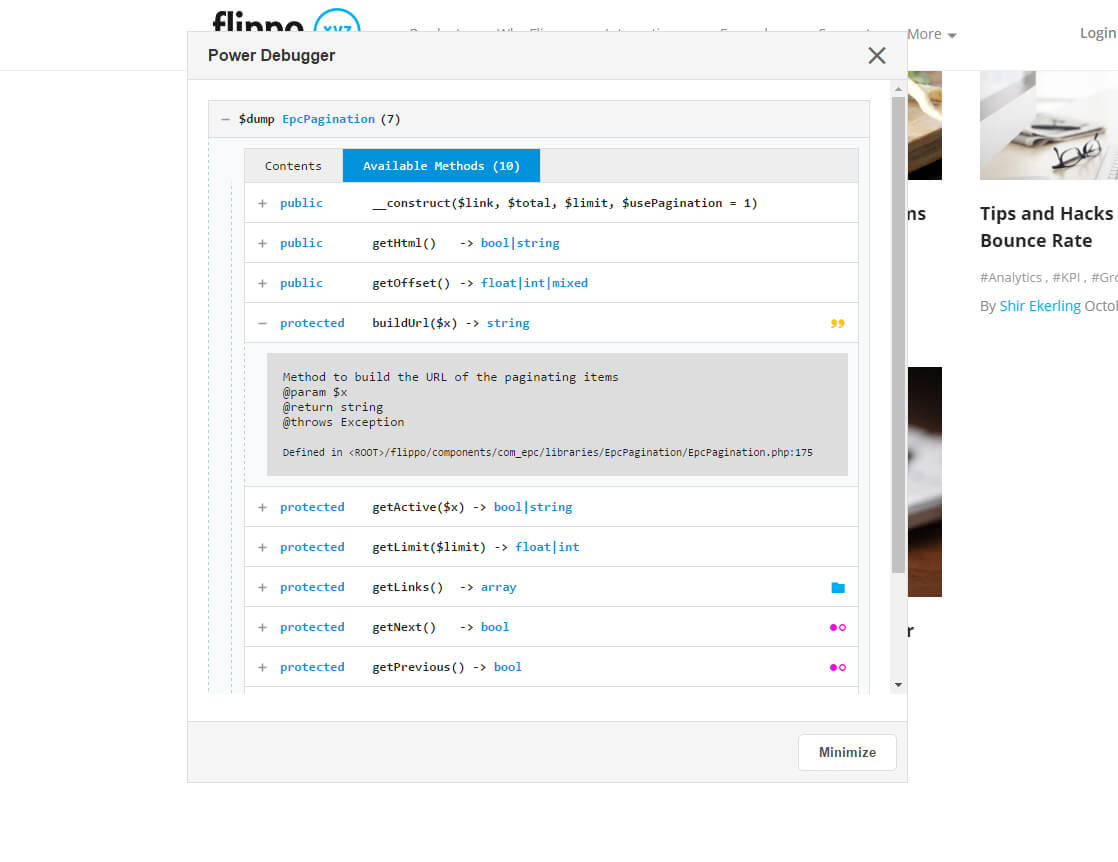
There isn’t really much to say, it’s pretty straightforward and everything is completely documented (as you can see in the dump in the image), so go ahead. And once again, to see the data so nicely, use the Power Debugger Plugin.