Plugins API (For Developers)
Power Content can be extended in many ways. One of them is by creating plugins that correspond to Power Content events. By doing so, you are able to manipulate, add, and remove functionality. Please make sure you first understand the general idea of how plugins work in Power Content. It’s very intuitive and basically not much different than any other Joomla plugin, but still. Learn about Power Plugins In General.
Topics that will be covered in this article:
- Intro to Power Content plugins development
- Adding tabs to Power Content
- Plugin events
Intro to Power Content plugins development
In order to gain “access” to Power Content’s events, you plugin has to be under the group “powercontent”. For example: plugins/powercontent/yourplugin/yourplugin.php
This means two things:
- In your XML, you should define “powercontent” as the group of the plugin at the extension tag.
- Your plugin should "sit" in a folder called “powercontent” inside the plugins folder. Simply defining the group in your XML file and then installing the plugin will automatically do that for you.
After you’ve done that, you can start developing your plugin. Take, for example, the Power Content social sharing plugin that comes built in with Power Content. Open its entry point (socialsharing.php). You’ll see the following:
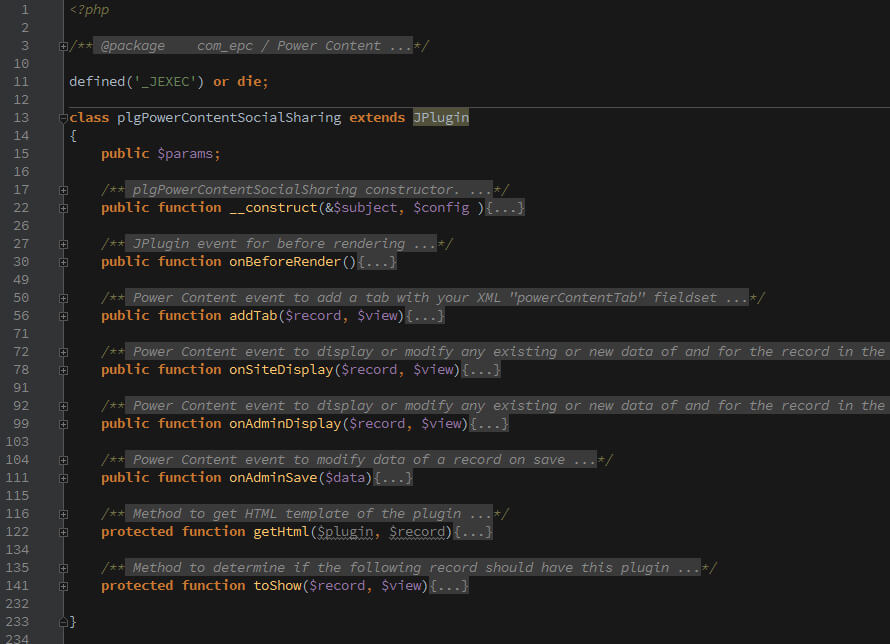
As you can see, you extend the JPlugin class, and not a class of Power Content. You don’t need any Power Content classes as long as your plugin’s group is “powercontent”.
You will also see the onBeforeRender() and __construct(), which are JPlugin methods. You can use any JPlugin methods and properties, just like in system plugins. In this plugin, for example, in the Social Sharing plugin, I’m using the onBeforeRender() to add CSS and JS to the documents head.
Adding tabs to Power Content
One of Power Content’s greatest features is letting developers add new tabs to records such as items, categories, authors, and tags, and letting users interact with them just like they interact with any other part of Power Content.
Before I explain the addTab() event, I want to show you an example of a built-in plugin that comes with Power Content’s installation. This plugin is called “Power Content Social Sharing” and is used to display social share buttons on items views.
Take a look at the following three pictures and then I’ll explain:
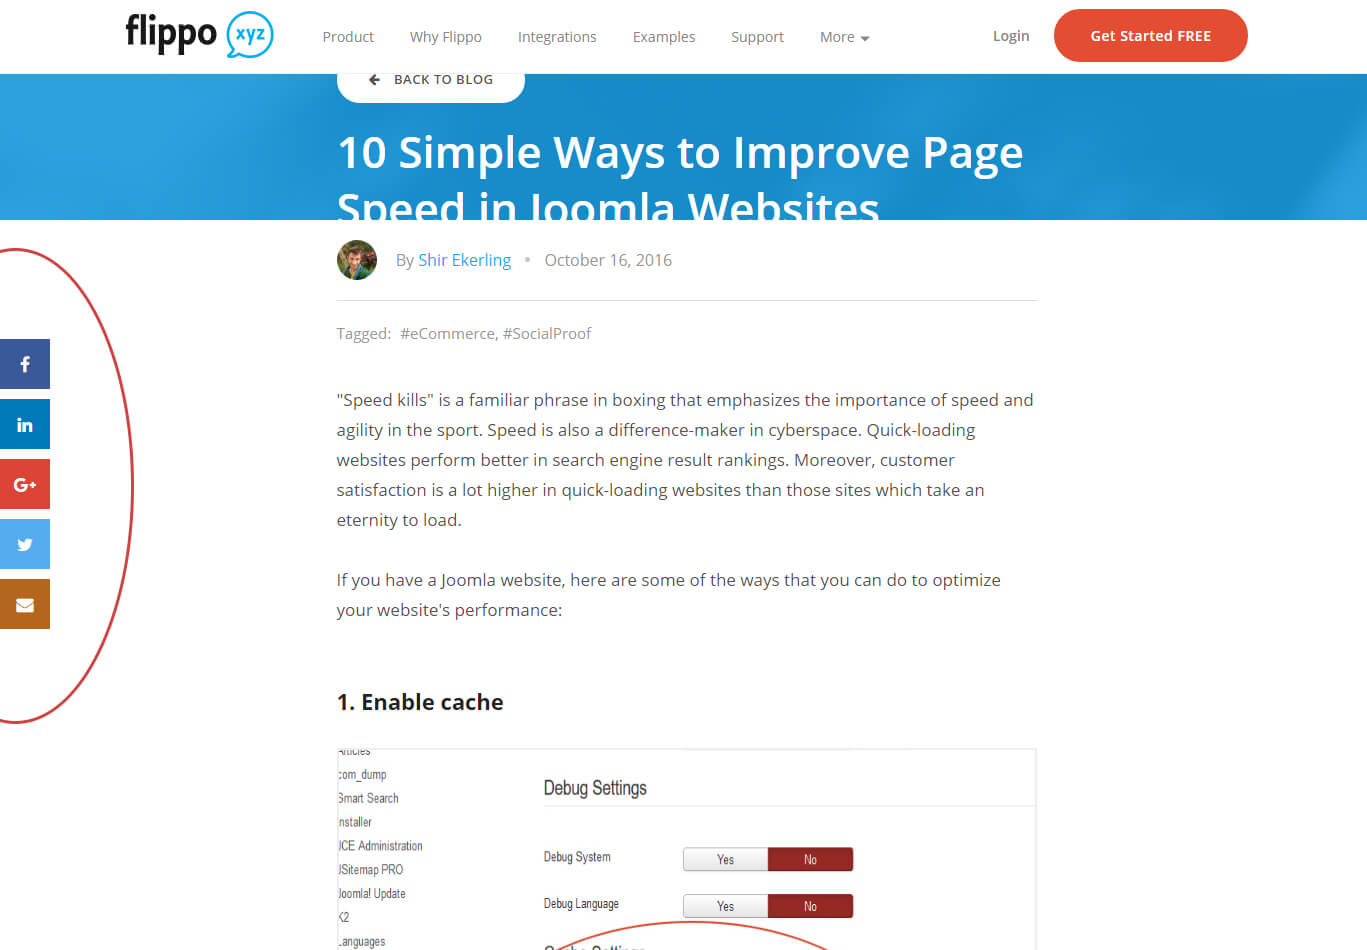
The first picture is the final output of this plugin, social share buttons.
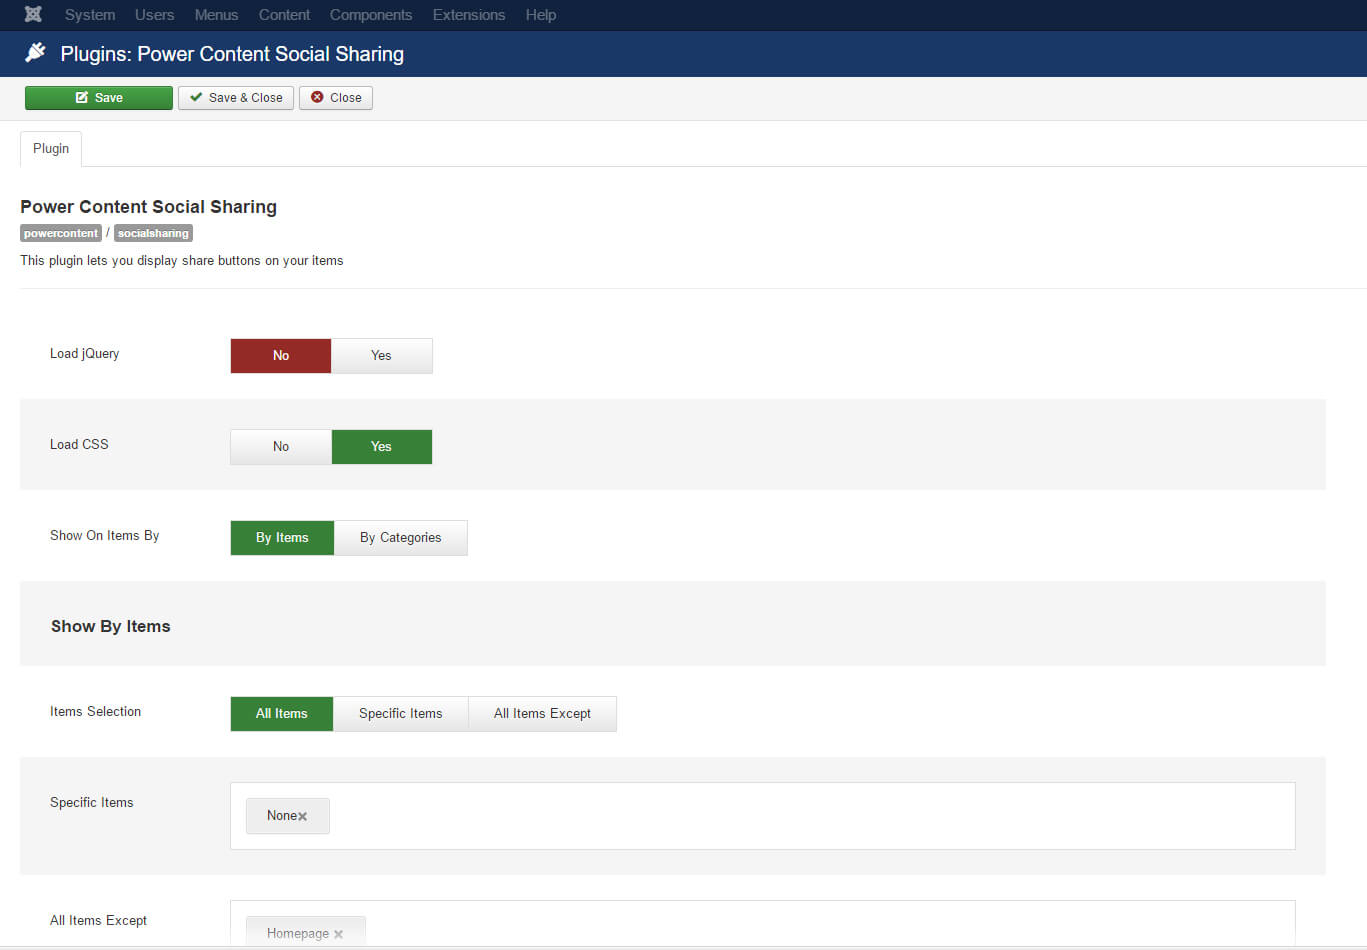
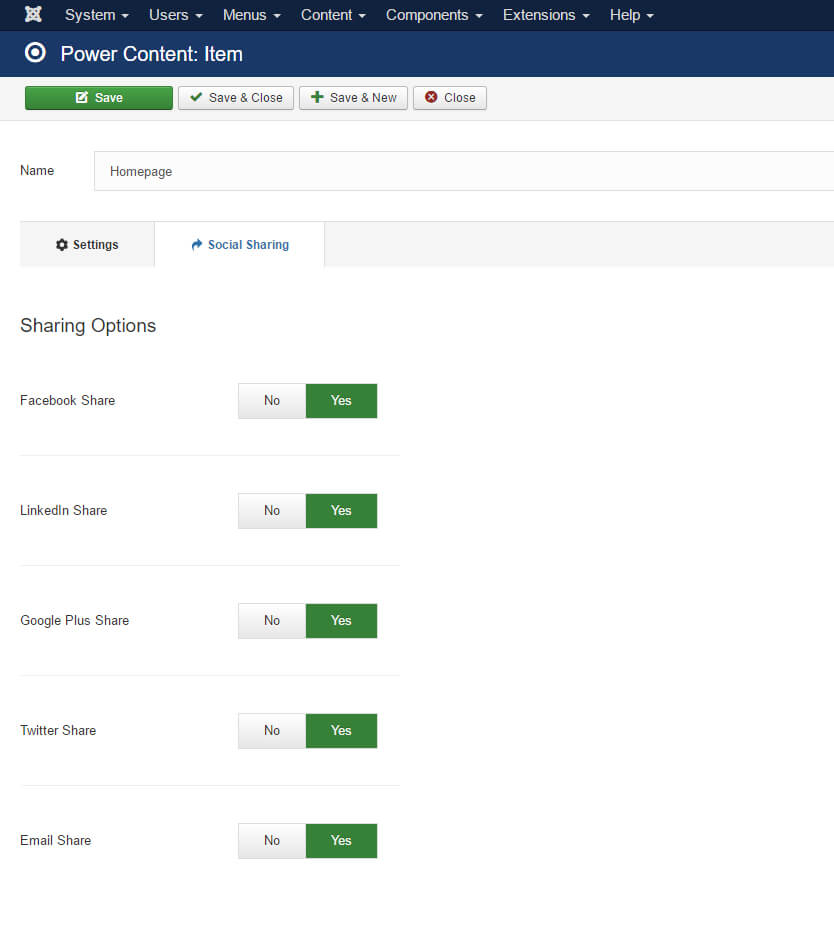
The second image is the plugin view and its settings, just like in any other Joomla plugin. Note that I’m using some filtering in order to let the users decide where and how to show the social sharing tab, on which items and by which filter (items/categories filter). The tab itself, in the item view, looks like the one in the third image. As you can see, the entire “regular” settings of the item are now placed in a tab called “Settings” and the sharing options are in a new tab called “Social Sharing”.
In order to add tabs, you’ll write the following method:
public function addTab($record, $view)
{
    $tabData = [
        'pluginName'  => $this->_name,
        'displayName' => 'Your Plugin Display Name',
        'iconClass'   => 'icon-someicon',
        'iconImage'   => null
    ];

    return $tabData;
}
In order to create a tab, you MUST use this method and return an array with the name of the plugin (so I can process its form), a display name that will be shown in the tab, icon class (you can find Joomla’s built-in icons here: https://docs.joomla.org/J3.x:Joomla_Standard_Icomoon_Fonts), or a URL for an image icon that will be displayed. You can also not pass anything or pass nulls if you don’t want any icons.
One more important thing: the addTab() method has two arguments, $record, which is an object containing the entire existing data of the record shown; and $view, which is the name of the view being shown. You can use those arguments to define if your tab will exist on items only, categories only, authors only, tags only, all of them, or some combination of them. You can also let your users define it with your regular plugin params. If you look at the social sharing plugin, I’ve created a method called toShow() that is responsible for deciding to show the tab according to the current view and user settings, according to what the users have selected in the plugin settings.
To make the tab itself, you simply need to define your fields in the XML file in a proper naming convention. Take a look at the below image and I’ll explain:
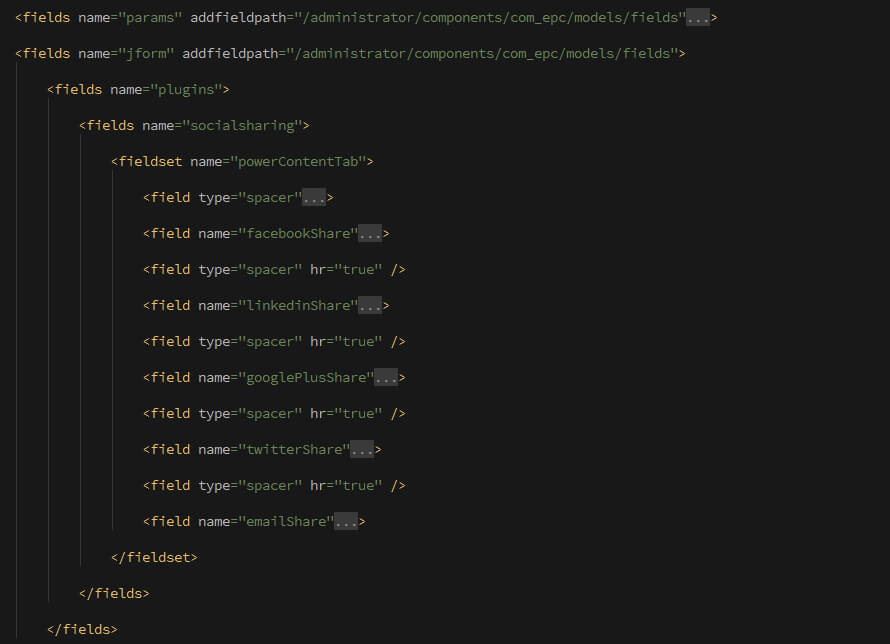
The XML code above is the standard plugin XML just like on any other Joomla plugin:
plugins/powercontent/socialsharing/socialsharing.xml
The first group of fields is “params” which is the standard group for your plugin settings. It doesn’t affect the tabs in any way and is used for your plugins settings and for you code only.
Then, you’ll see the following convention: jform -> plugins -> socialsharing. Inside the socialsharing fields group, you can find the fieldset that will be shown as the tab. I'll further explain:
In order to show a tab, you don’t actually need this convention. Any fieldset, in any group of fields that is named “powerContentTab” will show as a tab. BUT, if it is not in the above picture convention, when users save a record in Power Content, their settings WON’T be saved to Power Content’s plugins table in the database. If you keep the conventions, it WILL be saved.
You don’t HAVE to use it; you can use your own tables and your own code to save and display your data using another plugin event that I’ll explain later in this documentation. But, this convention makes it very easy and automated for you. Your choice.
Note that your XML can use Power Content custom form fields as well as validations. Take a look at the image below:

You can see that I added an attribute to my params with the field’s path for Power Content form fields. Now I can use Power Content’s form fields, such as the EpcPluginStyler that you can see in the picture. This particular field is responsible for designing the plugin’s UI a little bit so it looks better. It is also responsible for “hiding” the tab from your plugin settings so it will only be shown in the records. There are other cool fields, such as EpcCustomQuery, EpcThemesSelector, and more. I encourage you to take a look at those, and maybe some of them can help you.
Setting up validations (image example below):
Frontend required validation: Simply add a class “.epc-validation-required” to your field.
Server required validation: Simply add an attribute epcValdation = “required” to your field
Server numeric validation: Simply add an attribute epcValidation = “numeric” to your field.
Server unique validation: Simply add an attribute epcValidation = “unique” to your field.
You can add your own validations with the plugin events and custom JForm fields, of course.
As you can see, this field is of the type EpcCustomQuery and is using both the frontend and the backend “required” validations. Those validations can be used for all types of fields, not just Power Content’s.
When a user saves the record, your data will be stored in the “plugins” table, as JSON. Decoding this JSON will give you a plugins object that contains all the available plugins as objects by their name (note the convention of the XML fields) and their values.
To display your HTML in the frontend, you will use the onSiteDisplay() event. I’ll explain that in the next section.
Plugin events
addTab() – explained in the previous section
onSiteDisplay() – This event is fired when the view is loading, and you can use this to manipulate data, insert your HTML, and more. It has two arguments: $record and $view, so you can manipulate the data on display. Power Content will call echo all the plugins “value” property in the default themes. (foreach $this->plugins as $plugin echo $plugin->value). Don’t worry about not providing a value property if you don’t want to, the default theme will not show any notices or warnings. In the Social Sharing plugin, you will see how I handle the data. I have a little method of displaying the HTML layout of the plugin with the data the user has selected, and I attach all of this as a string to the “value” property. You can do it in a different way if you like - this isn’t some built-in event, just my own way to handle this plugin’s display.
onAdminDisplay() – This event is fired when the admin view is loading and you can use it to manipulate the data, it has two arguments: $record and $view, so you have the utmost power. If, for example, you want to change the record name, all you need to do is $record->name = ‘New Name’; and the record will appear with the new name. NOTE: Any data manipulation you do here is not going to be saved automatically, so in the name changing example, the name you have chosen will appear, but it won’t be saved unless the user manually saves the record.
onAdminSave() – This event is fired on record save, and it has one argument: $data, which is an array of keys and values. In order to manipulate values on save, you will change/insert/edit whatever you want to the $data argument, and then return it after your manipulations. Here, as opposed to the onAdminDisplay(), if you change the $data[‘name’], it will be saved with your change.
onSearchResultsDisplay() - An event that triggers when the search results page is rendered, it has one argument: $search, which is an object containing the search keyword, the amount of results, and an array of results.
onLiveSearch() - Event that triggers when a user activates the AJAX search, it has three arguments: $ajaxResults = array of results, $question = the keyword the users searched, and $itemsLimit = the results limit the user has set in the configuration.
onVoteBeforeProcess() - Event that triggers when a user voted. It is triggered before any validations and processing has happened to his request. It gets two arguments: $itemId = the ID of the item he tries to vote for, and $voteDirection = his vote request, up or down.
onVoteAfterProcess() - Event that triggers on a user vote, after the vote has been processed. Gets two arguments: $itemId = the ID of the item he tries to vote for, and $voteDirection = his vote request, up or down. And $response = a JSON object with the response for his vote.
onCommentBeforeProcess() - Event that triggers when a user submits a comment, before validations and comment processing. Takes one argument: $commentData = which is an array of the comment he tries to submit.
onCommentAfterProcess() - Event that triggers when a user has submitted a comment, after the comment has been processed. Takes two arguments: $commentData = which is an array of the comment he tries to submit, and $response = a JSON object with the response for the comment.
onBeforeFormatting() - Event that triggers before a record is being formatted, before record links are built, fields, plugins and options decoded and date formatted. Has one argument: $data = which is the data for the record, sometimes an array of objects, sometimes an object. It depends on the type of the record and the view.
You can find additional documentation about those methods and events in the Social Sharing plugin as doc blocks (comments) above the methods.