Power Content Themes Engine
Power Content features a unique and incredibly powerful themes engine. Its concept is to allow you create different themes or layouts for anything and everything in your system. Usually, other CCKs have something that is called “Content Types” where you create regular templates for each different type of layout. This is powerful but very tedious and in most cases is even unneeded. They also usually use custom fields attached to each specific content type, and this method is generally fine but has TONS of flaws. On the other hand, K2, for example, has something they call “Templating Options”, which is easier than the content types but less powerful, mainly because it works for a category only; for each different item you will need a different category, and you have very little control over tags and authors, for instance.
Power Content brings the all of the power of Content Types and Templating Options to something I like to call the “Themes Engine”.
Topics that will be covered in this article:
- Setting up new themes
- Assigning themes to records (items, categories, authors, and tags)
- An example of what you can achieve
Setting up new themes
Setting up new themes is easy. All you need to do is create a folder called “themes” in your templates: html/com_epc/.
It should look like this:
root/templates/yourtemplate/html/com_epc/themes
Any new folder inside this “themes” folder will now be considered a new theme that you can assign to your pages. Take a look at the following picture and I’ll explain:
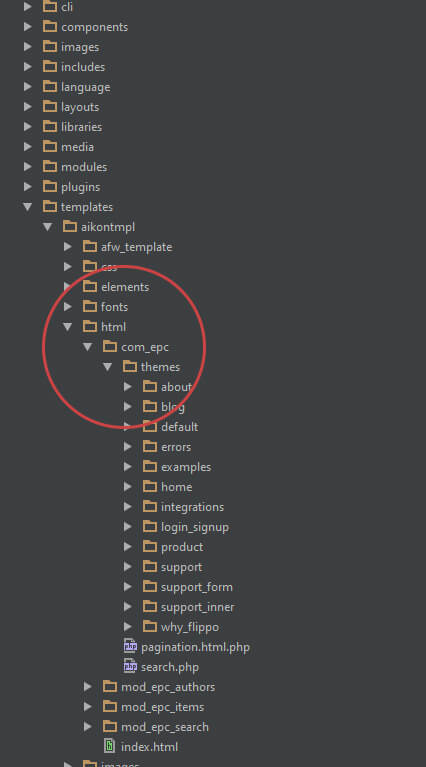
As you can see in the image, I have a lot of themes inside the “theme” folder. Now take a look at the picture below once again:
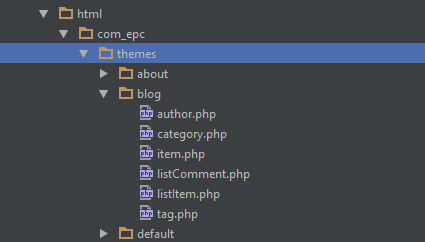
As you can see here, inside the blog “theme”, I have six layouts:
- A layout for the blog category: category.php
- A layout for the blog items: item.php
- A layout for authors displaying in the blog: authors.php
- A layout for tags displaying in the blog: tags.php
- A layout for the items in the category view (the list of items): listItem.php
- A layout for the comments in the item view: listComment.php
Now we have a complete “Blog” theme. In the next section, you will learn how to assign your themes to your pages. For now, there are several other things you need to understand.
The original files, can be found at:
root/components/com_epc/views/{recordType}/tmpl/{theFile}.
By “recordType” I mean item OR category OR author OR tag. And by “theFile” I mean the actual name of the file: default.php OR listItem.php OR listComment.php.
Those files, of course, are the default themes for your records and will be loaded under two conditions:
- You didn’t set your own theme.
- You did set your own theme but made some mistake and Power Content couldn’t find it.
As long as you follow the instructions on this documentation, your themes will be loaded just fine.
NOTE: It is clever, at least for when you start with Power Content, to copy the code from the original file to your newly created theme and modify it, instead of writing for 0. After you get a little more familiar with the system and how everything works together, by all means—write from scratch.
One more important thing: You can create a theme called “default” (as I did in the picture). Now, if I don’t assign a theme to my records, they will be taken from my custom default theme instead of from the original files of the component.
Assigning themes to records (items, categories, authors, and tags)
After we’ve created the structure for our themes, as explained in the previous section, it is time to assign those to our records (pages). The tags, authors, and categories work exactly the same, and the items has an additional option. So let’s begin with the tags, authors, and categories. Take a look at the following picture and I’ll explain:
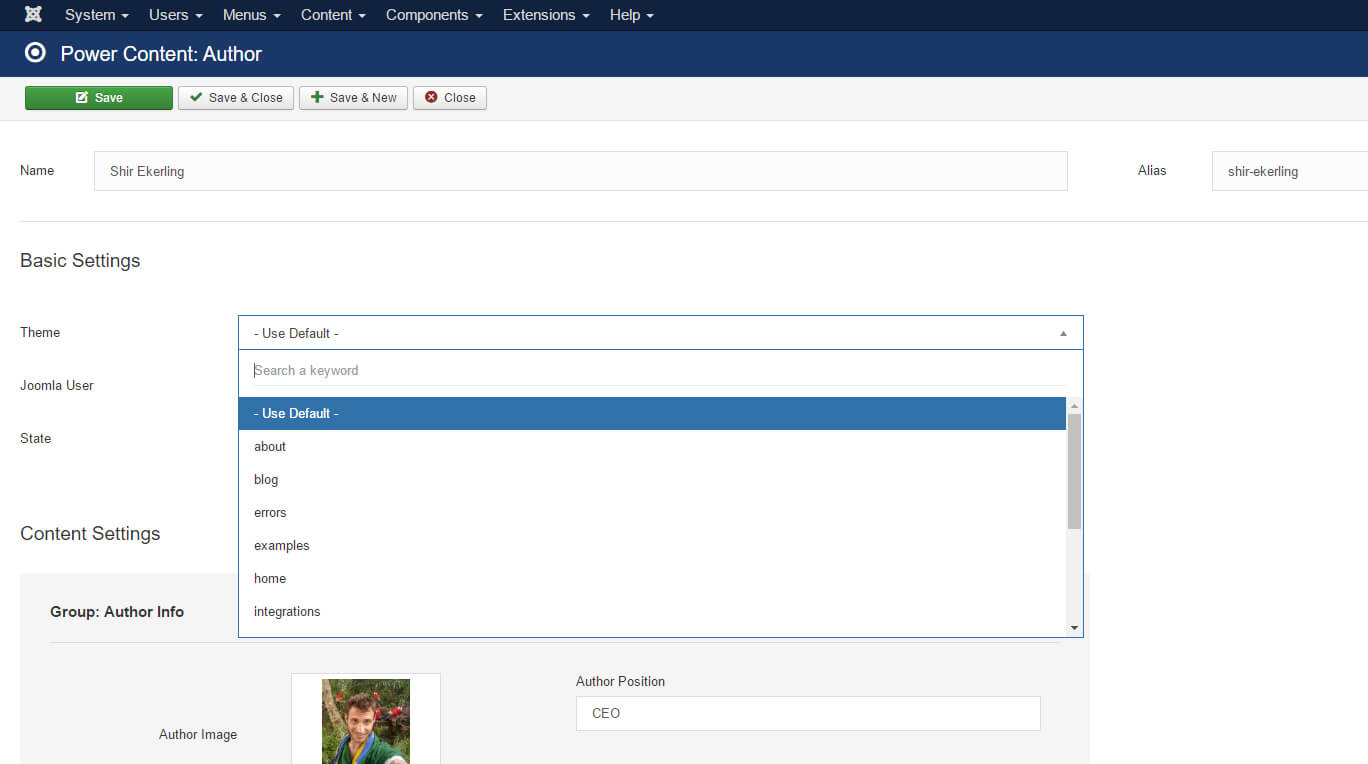
You can see here the assignment of the theme to the author Shir Ekerling (me). If I choose to assign this page to the “Blog” theme, the layout of Shir Ekerling in the website will be the file author.php in the folder “blog”; that is:
yourtemplate/html/com_epc/themes/blog/author.php
This is done exactly the same for tags and categories. TIP: The default value for author, categories, and tags is: “- Use Default –“. If, for instance, you have a lot of tags or a lot of authors in your website, and they all have the same layout and design, assigning a theme to each and every one of them is tedious so don’t do this. Simply create a folder called “default” in the themes folder and put tag.php and author.php (you can also do this for items and categories) inside it. Now, each new author or tag that is created will have YOUR default theme instead of the components, without assigning anything. If there are specific authors or tags that you want to display in a different layout, simply assign them with a different theme than the “default”.
Assigning themes for items:
In the case of items, there’s an additional powerful option called “Inherit from Category”.
Take a look at the following pictures and I’ll explain:
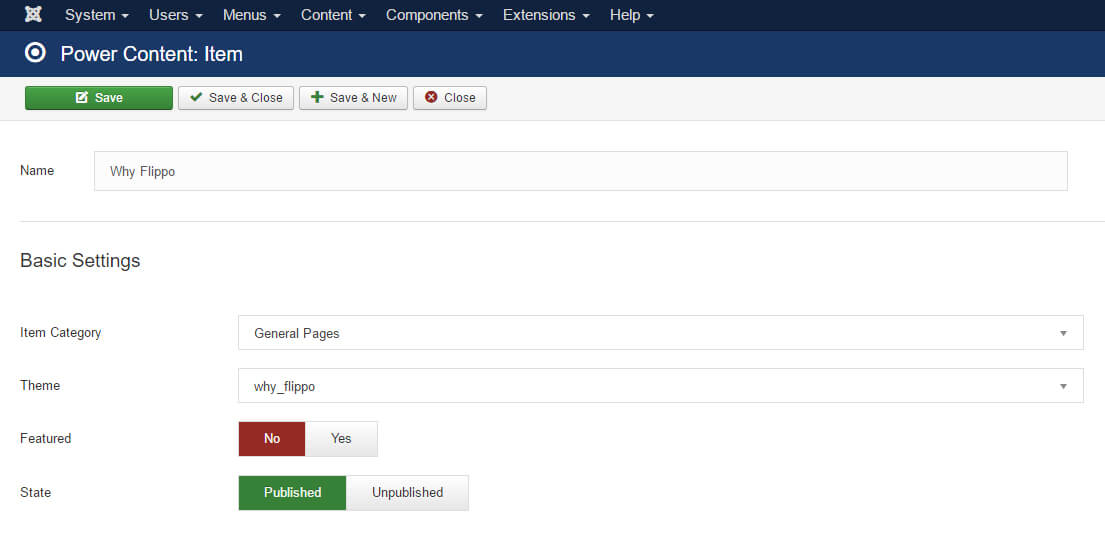

You can see in the first two pictures that I have an item called “Why Flippo”. This item is under a category called “General Pages”. My homepage, about page, and a lot of other pages are also under this category. But even though each of these items has a completely different theme with a completely different design, the category itself has a completely different design itself. As you can see in the pictures, all I had to do was create the folder “why_flippo” and assign it to the “Why Flippo” item. The same goes for the homepage and other pages of this category.
The last two pictures are different. The default option for items themes is “Inherit from Category”. This means that every item inside this category will have the layout of the theme assigned to its category. In this case, the “Blog” category has many blog items, and each theme is using the “Blog” category theme by loading the item.php of this theme. This way, we can easily create new blog items in which all of them look and work exactly the same. If we still want, for instance, some specific blog items to have a different theme, we will simply create this theme and assign it to those specific blog items. In this case, all the blog items BESIDES those will have their theme defined by their category.
I’ll throw in an example of what you can achieve:
Let’s say that we have the following items on our website:
Homepage, About Us, Services, and Contact Us.
In addition, we have a “Blog” and a “Portfolio”, which are categories that have different items. The blog has articles and the portfolio has case studies of previous work we’ve done. In the blog, we also have several authors and tags.
Using the templating engine we can do the following:
We will set up a category that is called “General Pages” and this will contain the Homepage, About Us, Services, and Contact Us. Each of these items will have its own theme (since their design and layout is completely different).
All the items in the blog and the portfolio will take their theme from their category; that way, each time we create a new blog item or a new case study, it will automatically be set up with the right theme. BUT, we have two specific case studies that we want to set up in a different layout. In that case, we will simply go to their item and change the theme.
All the authors BUT one will have the “default” theme for authors. The different one will simply have a different theme in its settings. The same goes for tags, for instance.
I hope that you have managed to understand the power of the themes engine. Start playing with it a little bit, and I'm sure that you’ll quickly get the hang of it.